Amazon Redshift
Events can be sent to an Amazon Redshift table using the redshift sink type. Svix writes to Redshift through the Redshift Data API , and supports both Redshift Serverless and provisioned clusters.
Like all Sinks, Redshift sinks can be created in the Stream Portal…
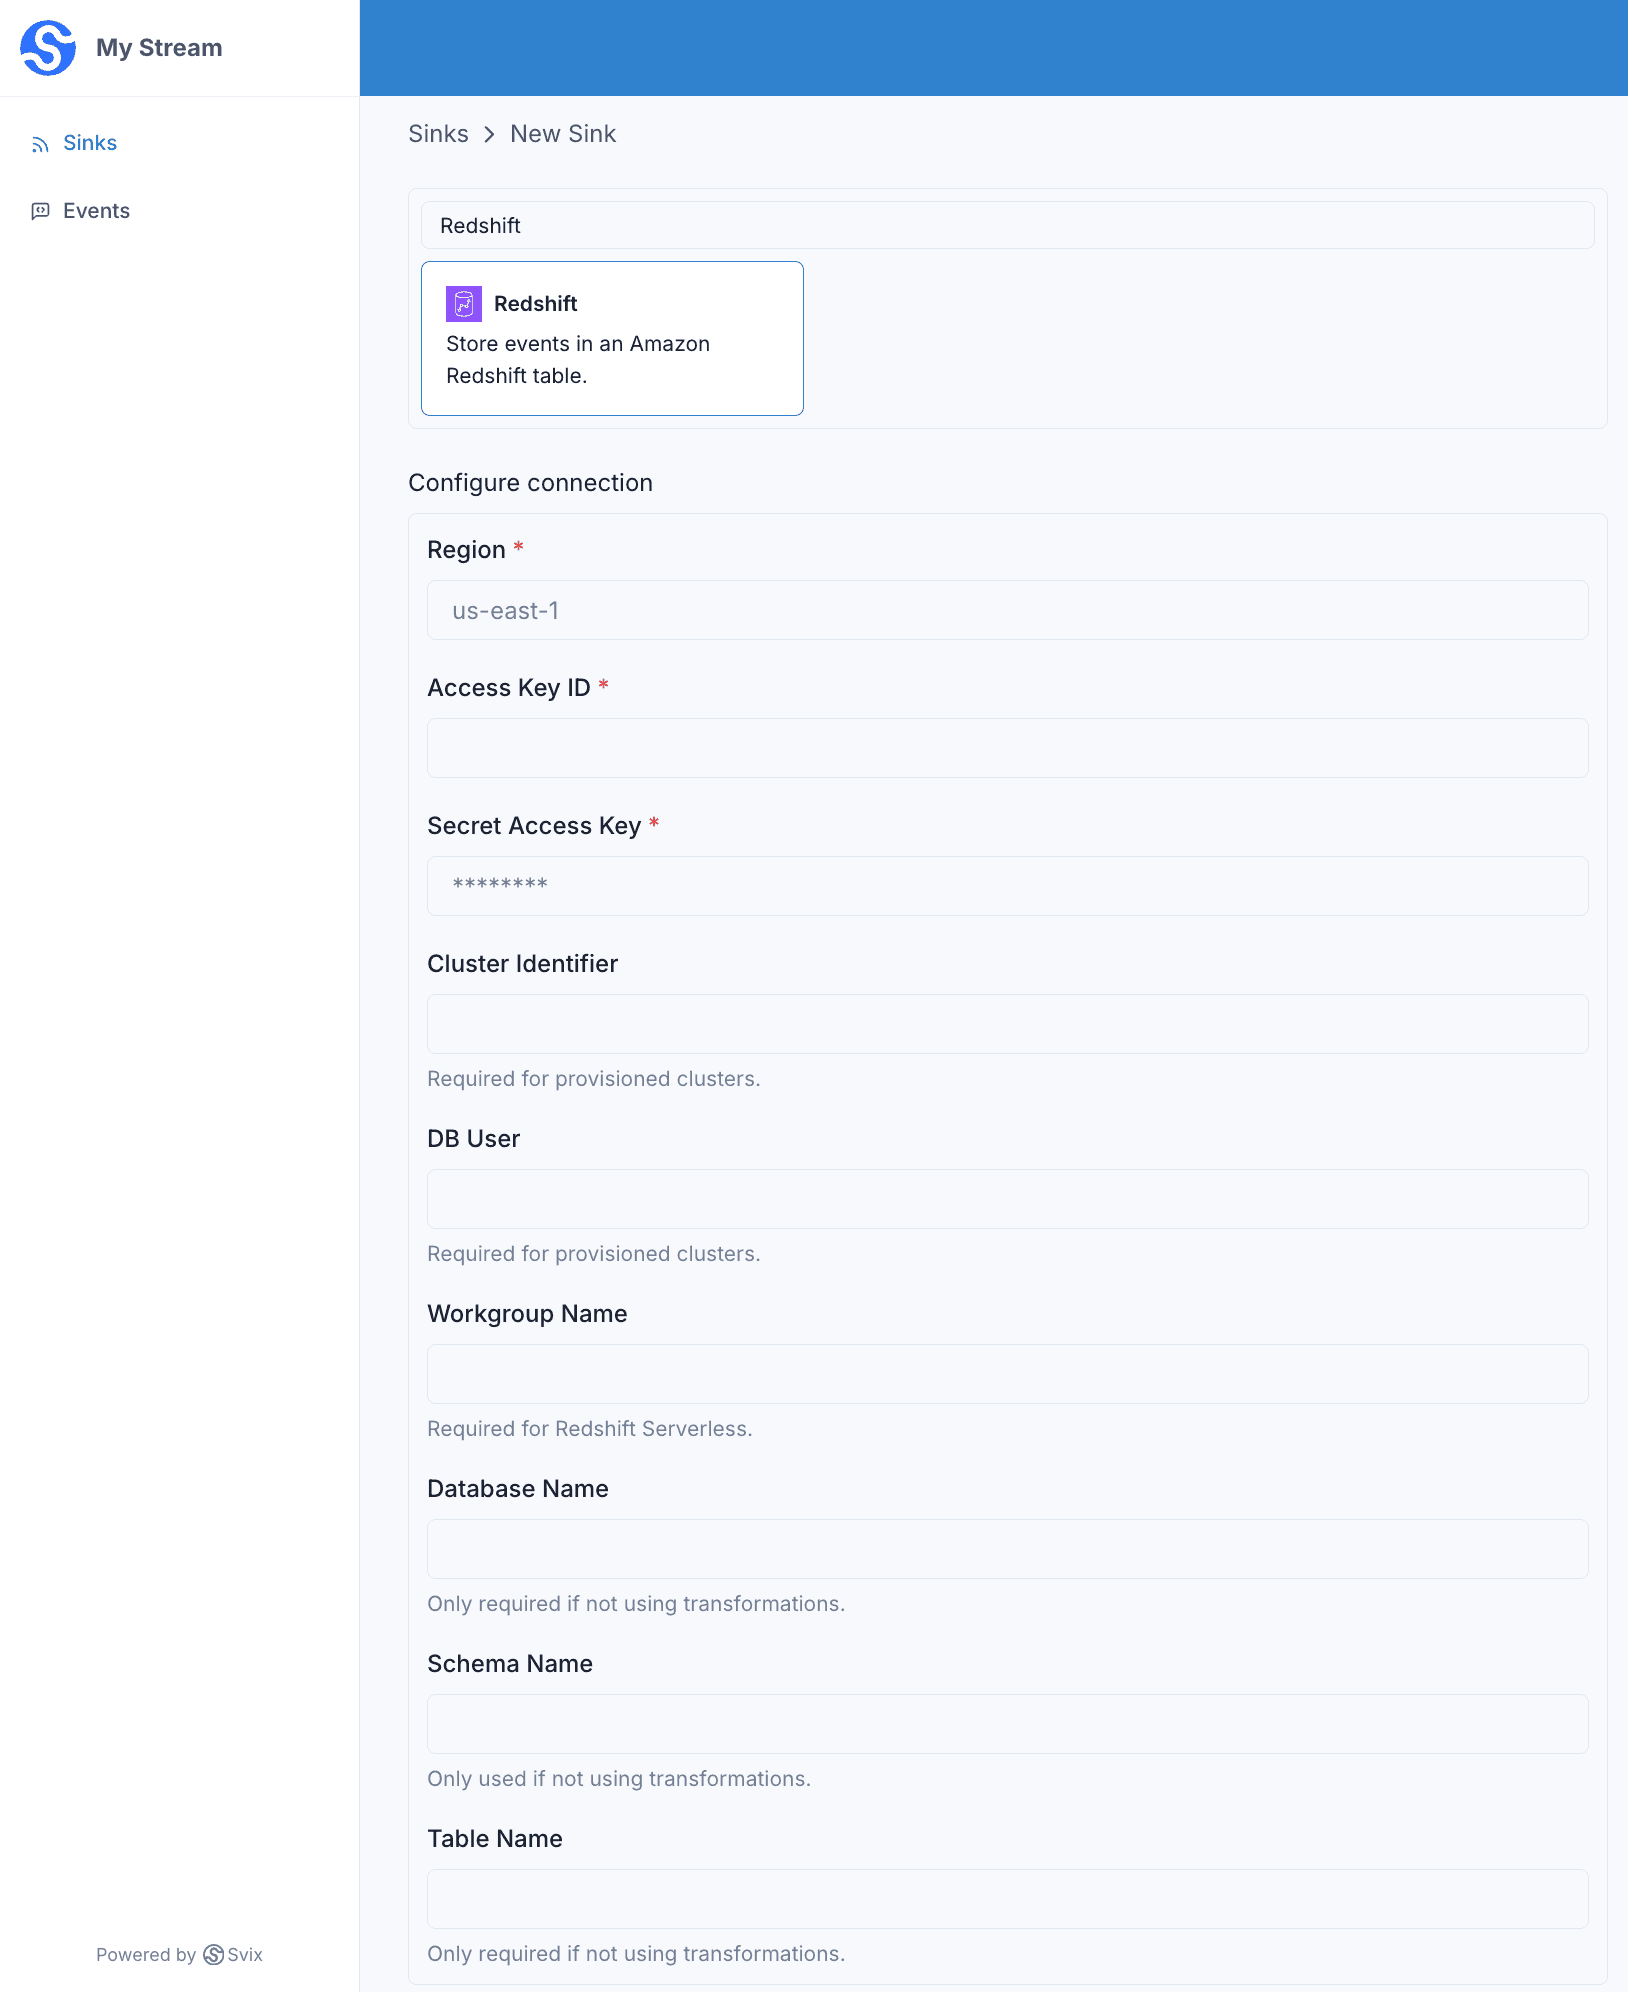
… or in the API .
curl -X 'POST' 'https://api.svix.com/api/v1/stream/strm_30XKA2tCdjHue2qLkTgc0/sink' \
  -H 'Authorization: Bearer AUTH_TOKEN' \
  -H 'Content-Type: application/json' \
  -d '{
  "type": "redshift",
  "config": {
    "region": "us-west-2",
    "accessKeyId": "AKIA3LIKMTLDNWBX2PPD",
    "secretAccessKey": "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",
    "workgroupName": "default",
    "dbName": "dev",
    "tableName": "events"
  },
  "uid": "unique-identifier",
  "status": "enabled",
  "batchSize": 1000,
  "maxWaitSecs": 300,
  "eventTypes": [],
  "metadata": {}
}'
Every event batch is inserted into the configured Redshift table.
region,accessKeyId,secretAccessKey— the AWS region and credentials used to authenticate.dbName— the database to write to.schemaName— the schema that contains the table (optional).tableName— the table that receives the rows.
Connection
How you point Svix at your Redshift depends on the deployment type:
- Redshift Serverless — set
workgroupNameto the name of your workgroup. - Provisioned clusters — set
clusterIdentifierto your cluster’s identifier anddbUserto the database user to connect as.
# Provisioned cluster variant of the config block
  "config": {
    "region": "us-west-2",
    "accessKeyId": "AKIA3LIKMTLDNWBX2PPD",
    "secretAccessKey": "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",
    "clusterIdentifier": "my-cluster",
    "dbUser": "awsuser",
    "dbName": "dev",
    "tableName": "events"
  }
Destination table
Without a transformation, Svix inserts each event into the table identified by dbName, schemaName, and tableName using two columns: created_at and payload. Svix sets created_at to the insert time and writes the raw event payload to payload.
The table must already exist before you enable the sink. For the default behavior, create it with:
CREATE TABLE events (
  created_at TIMESTAMP,
  payload VARCHAR(65535)
);
At the time of writing, VARCHAR(65535) is the largest allowable VARCHAR size in Redshift. If events with larger payloads are written to the stream, the sink will be disabled since these events can’t be written to Redshift.
The dbName, schemaName, and tableName fields are only required when you’re not using a transformation. With a transformation, the target table is named directly in your statement.
Transformations
Redshift transformations build a parameterized SQL statement. The transformation returns the statement to run and the bindings it references.
/**
 * @param input - The input object
 * @param input.events - The array of events in the batch. The number of events in the batch is capped by the Sink's batch size.
 * @param input.events[].payload - The message payload (string or JSON)
 * @param input.events[].eventType - The message event type (string)
 *
 * @returns Object describing the SQL to run against Redshift.
 * @returns returns.statement - The SQL statement to execute. Reference parameters by name (e.g. :payload0).
 * @returns returns.bindings - The parameters referenced by the statement. Each binding is an object with a `name` and a `value`.
 */
function handler(input) {
    let bindings = [];
    let values = [];

    input.events.forEach((event, i) => {
        const name = `payload${i}`;
        bindings.push({ name: name, value: JSON.stringify(event.payload) });
        values.push(`(CURRENT_TIMESTAMP, :${name})`);
    });

    return {
        bindings: bindings,
        statement: `INSERT INTO events (created_at, payload) VALUES ${values.join(", ")};`
    };
}
input.events matches the events sent in create_events.
bindings is an array of { name, value } parameters, and the statement references them by name (e.g. :payload0). The statement is run against your database through the Redshift Data API. To write different columns, adjust the bindings, the statement, and your table to match.
For example, if the following events are written to the stream:
curl -X 'POST' \
  'https://api.svix.com/api/v1/stream/{stream_id}/events' \
  -H 'Authorization: Bearer AUTH_TOKEN' \
  -H 'Accept: application/json' \
  -H 'Content-Type: application/json' \
  -d '{
        "events": [
            {
                "eventType": "user.created",
                "payload": "{\"email\": \"joe@enterprise.io\"}"
            },
            {
                "eventType": "user.login",
                "payload": "{\"id\": 12, \"timestamp\": \"2025-07-21T14:23:17.861Z\"}"
            }
        ]
    }'
The transformation above inserts two rows into your table.
created_at | payload |
|---|---|
2025-07-21 14:23:18 | {"email":"joe@enterprise.io"} |
2025-07-21 14:23:18 | {"id":12,"timestamp":"2025-07-21T14:23:17.861Z"} |
Authentication
You can authenticate sinks to Redshift using either a fixed AWS Access Key ID and Secret Access Key, or by using a role and cross-account delegated authentication. In either case, the target user/role must have the redshift-data:ExecuteStatement, redshift-data:BatchExecuteStatement, and redshift-data:DescribeStatement permissions on the appropriate cluster.
Authenticating with Amazon IAM Roles and STS
Some sinks support authenticating using delegated authentication with Amazon Identity and Access Management (IAM) Roles. This can be more secure than using a fixed access key and secure token, because the remote session can only be used from a dedicated, Svix-operated AWS account via the AWS Security Token Service . In order to use role-based authentication:
-
Create your resource (S3 bucket, etc) as normal
-
In AWS IAM, create a new role and grant it the appropriate policy on the resource; take note of the ARN of the role, which should look like
arn:aws:iam::111111111111:role/some-name. -
Create a trust policy for your new role that looks like the following:
{
    "Version": "2012-10-17",
    "Statement": [
        {
            "Effect": "Allow",
            "Principal": {
                "AWS": "565881507882"
            },
            "Action": "sts:AssumeRole",
            "Condition": {
                "StringEquals": {
                    "sts:ExternalId": "source:<stream ID>:id:"
                }
            }
        }
    ]
}
Note that the account 565881507882 is a dedicated, Svix-managed account used for all outgoing STS relationships.
-
Create a new sink
curl -X 'POST' 'https://api.svix.com/api/v1/stream/strm_abcdef1234567890abcde/sink' \
  -H 'Authorization: Bearer AUTH_TOKEN' \
  -H 'Content-Type: application/json' \
  -d '{
  "type": "amazonS3",
  "config": {
    "bucket": "my-s3-bucket-name",
    "region": "us-west-2",
    "roleArn": "<ARN of the role from step 2>
  },
  "uid": "unique-identifier",
  "status": "enabled",
  "batchSize": 1000,
  "maxWaitSecs": 300,
  "eventTypes": [],
  "metadata": {}
}'
External IDs
By default, Svix sets the sts:ExternalId property to source:<stream ID>:id:; in the example above, it would be the string source:strm_abcdef1234567890abcde:id:. If you have multiple streams that you would like to allow to write to the same bucket, you can
provide an externalId value of your own choosing as a property to the v1.streaming.sink.create call. This can be any string that does not contain the : character. The sts:ExternalId property
will then be set to source:<stream ID>:id:<your provided value>. You can then write your Trust Relationship as the following:
{
    "Version": "2012-10-17",
    "Statement": [
        {
            "Effect": "Allow",
            "Principal": {
                "AWS": "565881507882"
            },
            "Action": "sts:AssumeRole",
            "Condition": {
                "StringLike": {
                    "sts:ExternalId": "source:*:id:<your selected value>"
                }
            }
        }
    ]
}
Note that in this case, the External Id does serve as a secret, and an attacker with access to it could cause their own stream to write into your bucket.
For more information about the sts:ExternalID property, please see the AWS documentation Access to AWS accounts owned by third parties .