Amazon SQS
Events can be sent to an Amazon SQS queue using the sqs sink type.
Like all Sinks, SQS sinks can be created in the Stream Portal…
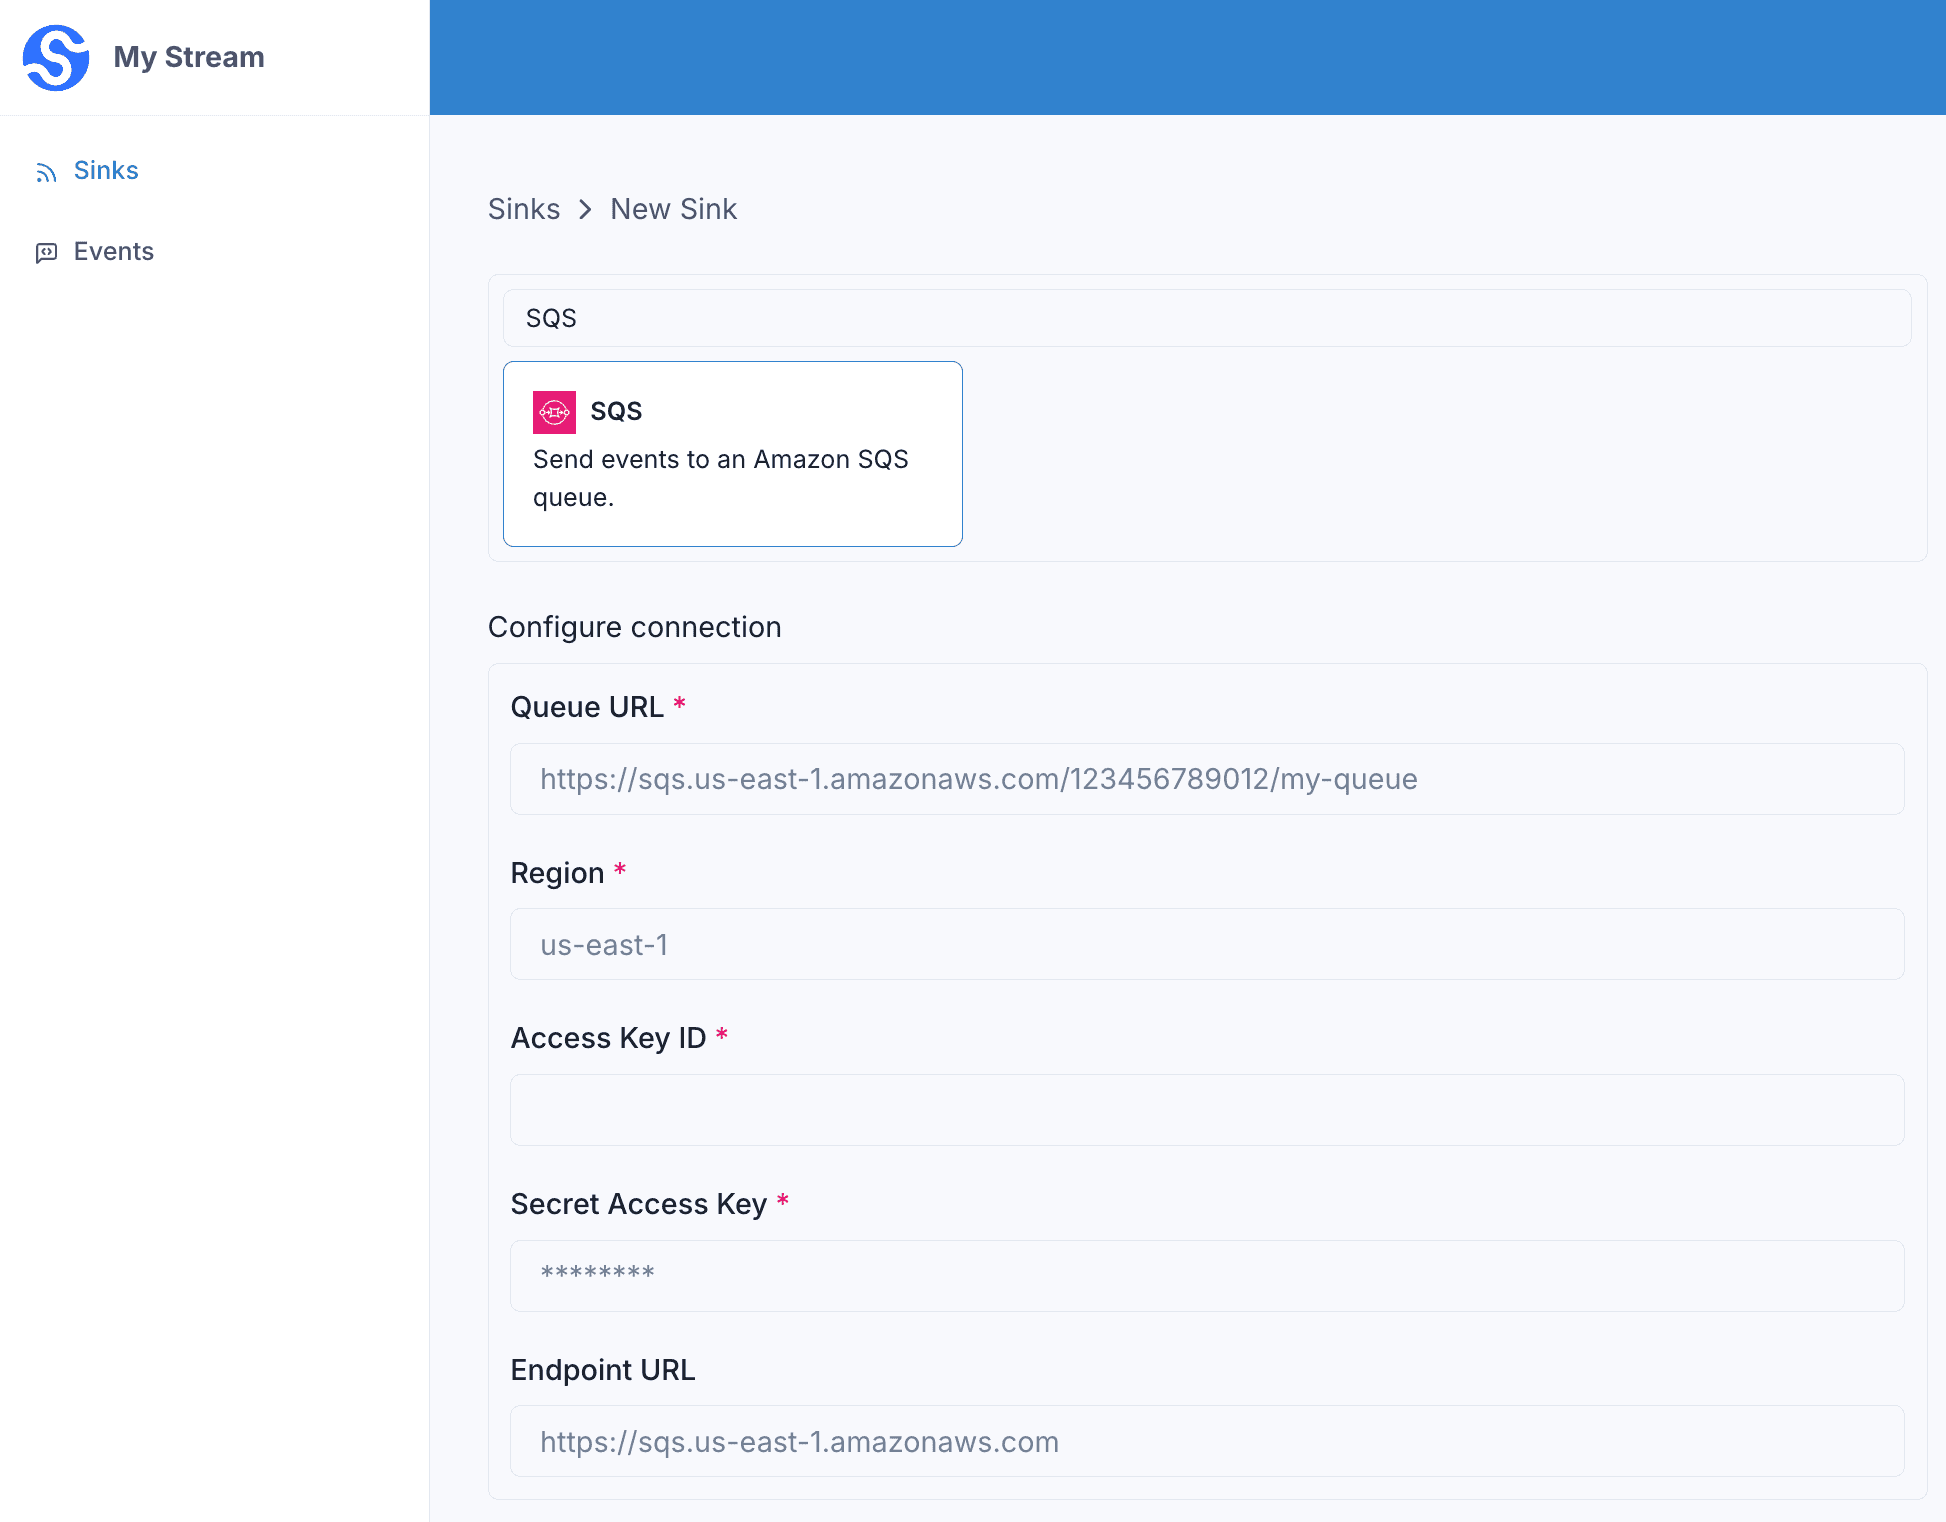
… or in the API .
curl -X 'POST' 'https://api.svix.com/api/v1/stream/strm_30XKA2tCdjHue2qLkTgc0/sink' \
  -H 'Authorization: Bearer AUTH_TOKEN' \
  -H 'Content-Type: application/json' \
  -d '{
  "type": "sqs",
  "config": {
    "queueUrl": "https://sqs.us-east-1.amazonaws.com/000000000000/my-queue",
    "region": "us-east-1",
    "accessKeyId": "AKIA3LIKMTLDNWBX2PPD",
    "secretAccessKey": "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"
  },
  "uid": "unique-identifier",
  "status": "enabled",
  "batchSize": 1000,
  "maxWaitSecs": 300,
  "eventTypes": [],
  "metadata": {}
}'
Every event in the batch is sent to the queue as a separate message.
queueUrl— the full URL of the SQS queue to send messages to.region,accessKeyId,secretAccessKey— the AWS region and credentials used to authenticate.
Transformations
By default, all sqs Sinks come bundled with the following transformation code.
/**
 * @param input - The input object
 * @param input.events - The array of events in the batch. The number of events in the batch is capped by the Sink's batch size.
 * @param input.events[].payload - The message payload (string or JSON).
 * @param input.events[].eventType - The message event type (string).
 *
 * @returns Object containing the response.
 * @returns returns.messages - The array of SQS messages to send to the SQS queue.
 * @returns returns.messages[].payload - The payload of the message (string).
 */
function handler(input) {
  const messages = input.events.map((event) => ({
    payload: event,
  }));

  return {
    messages,
  };
}
input.events matches the events sent in create_events.
Each entry in the returned messages array is sent as a separate SQS message, with its payload used as the message body. By default, each event is sent as its serialized JSON.
For example, if the following events are written to the stream:
curl -X 'POST' \
  'https://api.svix.com/api/v1/stream/{stream_id}/events' \
  -H 'Authorization: Bearer AUTH_TOKEN' \
  -H 'Accept: application/json' \
  -H 'Content-Type: application/json' \
  -d '{
        "events": [
            {
                "eventType": "user.created",
                "payload": "{\"email\": \"joe@enterprise.io\"}"
            },
            {
                "eventType": "user.login",
                "payload": "{\"id\": 12, \"timestamp\": \"2025-07-21T14:23:17.861Z\"}"
            }
        ]
    }'
The default transformation code would send two messages to your queue, with the following bodies.
{"payload":{"email":"joe@enterprise.io"},"eventType":"user.created"}{"payload":{"id":12,"timestamp":"2025-07-21T14:23:17.861Z"},"eventType":"user.login"}To control the message bodies, return your own array of messages. Each message’s payload becomes the body of one SQS message.
SQS accepts at most 10 messages per batch request, so larger batches are automatically split across multiple SendMessageBatch calls.
Authentication
You can authenticate sinks to SQS using either a fixed AWS Access Key ID and Secret Access Key, or by using a role and cross-account delegated authentication. In either case, the target user/role must have the sqs:SendMessage permission on the relevant queue.
Authenticating with Amazon IAM Roles and STS
Some sinks support authenticating using delegated authentication with Amazon Identity and Access Management (IAM) Roles. This can be more secure than using a fixed access key and secure token, because the remote session can only be used from a dedicated, Svix-operated AWS account via the AWS Security Token Service . In order to use role-based authentication:
-
Create your resource (S3 bucket, etc) as normal
-
In AWS IAM, create a new role and grant it the appropriate policy on the resource; take note of the ARN of the role, which should look like
arn:aws:iam::111111111111:role/some-name. -
Create a trust policy for your new role that looks like the following:
{
    "Version": "2012-10-17",
    "Statement": [
        {
            "Effect": "Allow",
            "Principal": {
                "AWS": "565881507882"
            },
            "Action": "sts:AssumeRole",
            "Condition": {
                "StringEquals": {
                    "sts:ExternalId": "source:<stream ID>:id:"
                }
            }
        }
    ]
}
Note that the account 565881507882 is a dedicated, Svix-managed account used for all outgoing STS relationships.
-
Create a new sink
curl -X 'POST' 'https://api.svix.com/api/v1/stream/strm_abcdef1234567890abcde/sink' \
  -H 'Authorization: Bearer AUTH_TOKEN' \
  -H 'Content-Type: application/json' \
  -d '{
  "type": "amazonS3",
  "config": {
    "bucket": "my-s3-bucket-name",
    "region": "us-west-2",
    "roleArn": "<ARN of the role from step 2>
  },
  "uid": "unique-identifier",
  "status": "enabled",
  "batchSize": 1000,
  "maxWaitSecs": 300,
  "eventTypes": [],
  "metadata": {}
}'
External IDs
By default, Svix sets the sts:ExternalId property to source:<stream ID>:id:; in the example above, it would be the string source:strm_abcdef1234567890abcde:id:. If you have multiple streams that you would like to allow to write to the same bucket, you can
provide an externalId value of your own choosing as a property to the v1.streaming.sink.create call. This can be any string that does not contain the : character. The sts:ExternalId property
will then be set to source:<stream ID>:id:<your provided value>. You can then write your Trust Relationship as the following:
{
    "Version": "2012-10-17",
    "Statement": [
        {
            "Effect": "Allow",
            "Principal": {
                "AWS": "565881507882"
            },
            "Action": "sts:AssumeRole",
            "Condition": {
                "StringLike": {
                    "sts:ExternalId": "source:*:id:<your selected value>"
                }
            }
        }
    ]
}
Note that in this case, the External Id does serve as a secret, and an attacker with access to it could cause their own stream to write into your bucket.
For more information about the sts:ExternalID property, please see the AWS documentation Access to AWS accounts owned by third parties .