Amazon Redshift
Svix can deliver webhooks directly to an Amazon Redshift table, without your customers having to set up any listener endpoint or write any glue code. Svix writes to Redshift through the Redshift Data API , and supports both Redshift Serverless and provisioned clusters.
When Advanced Destinations is enabled, your customers will see the option to use a Redshift destination in the App Portal.
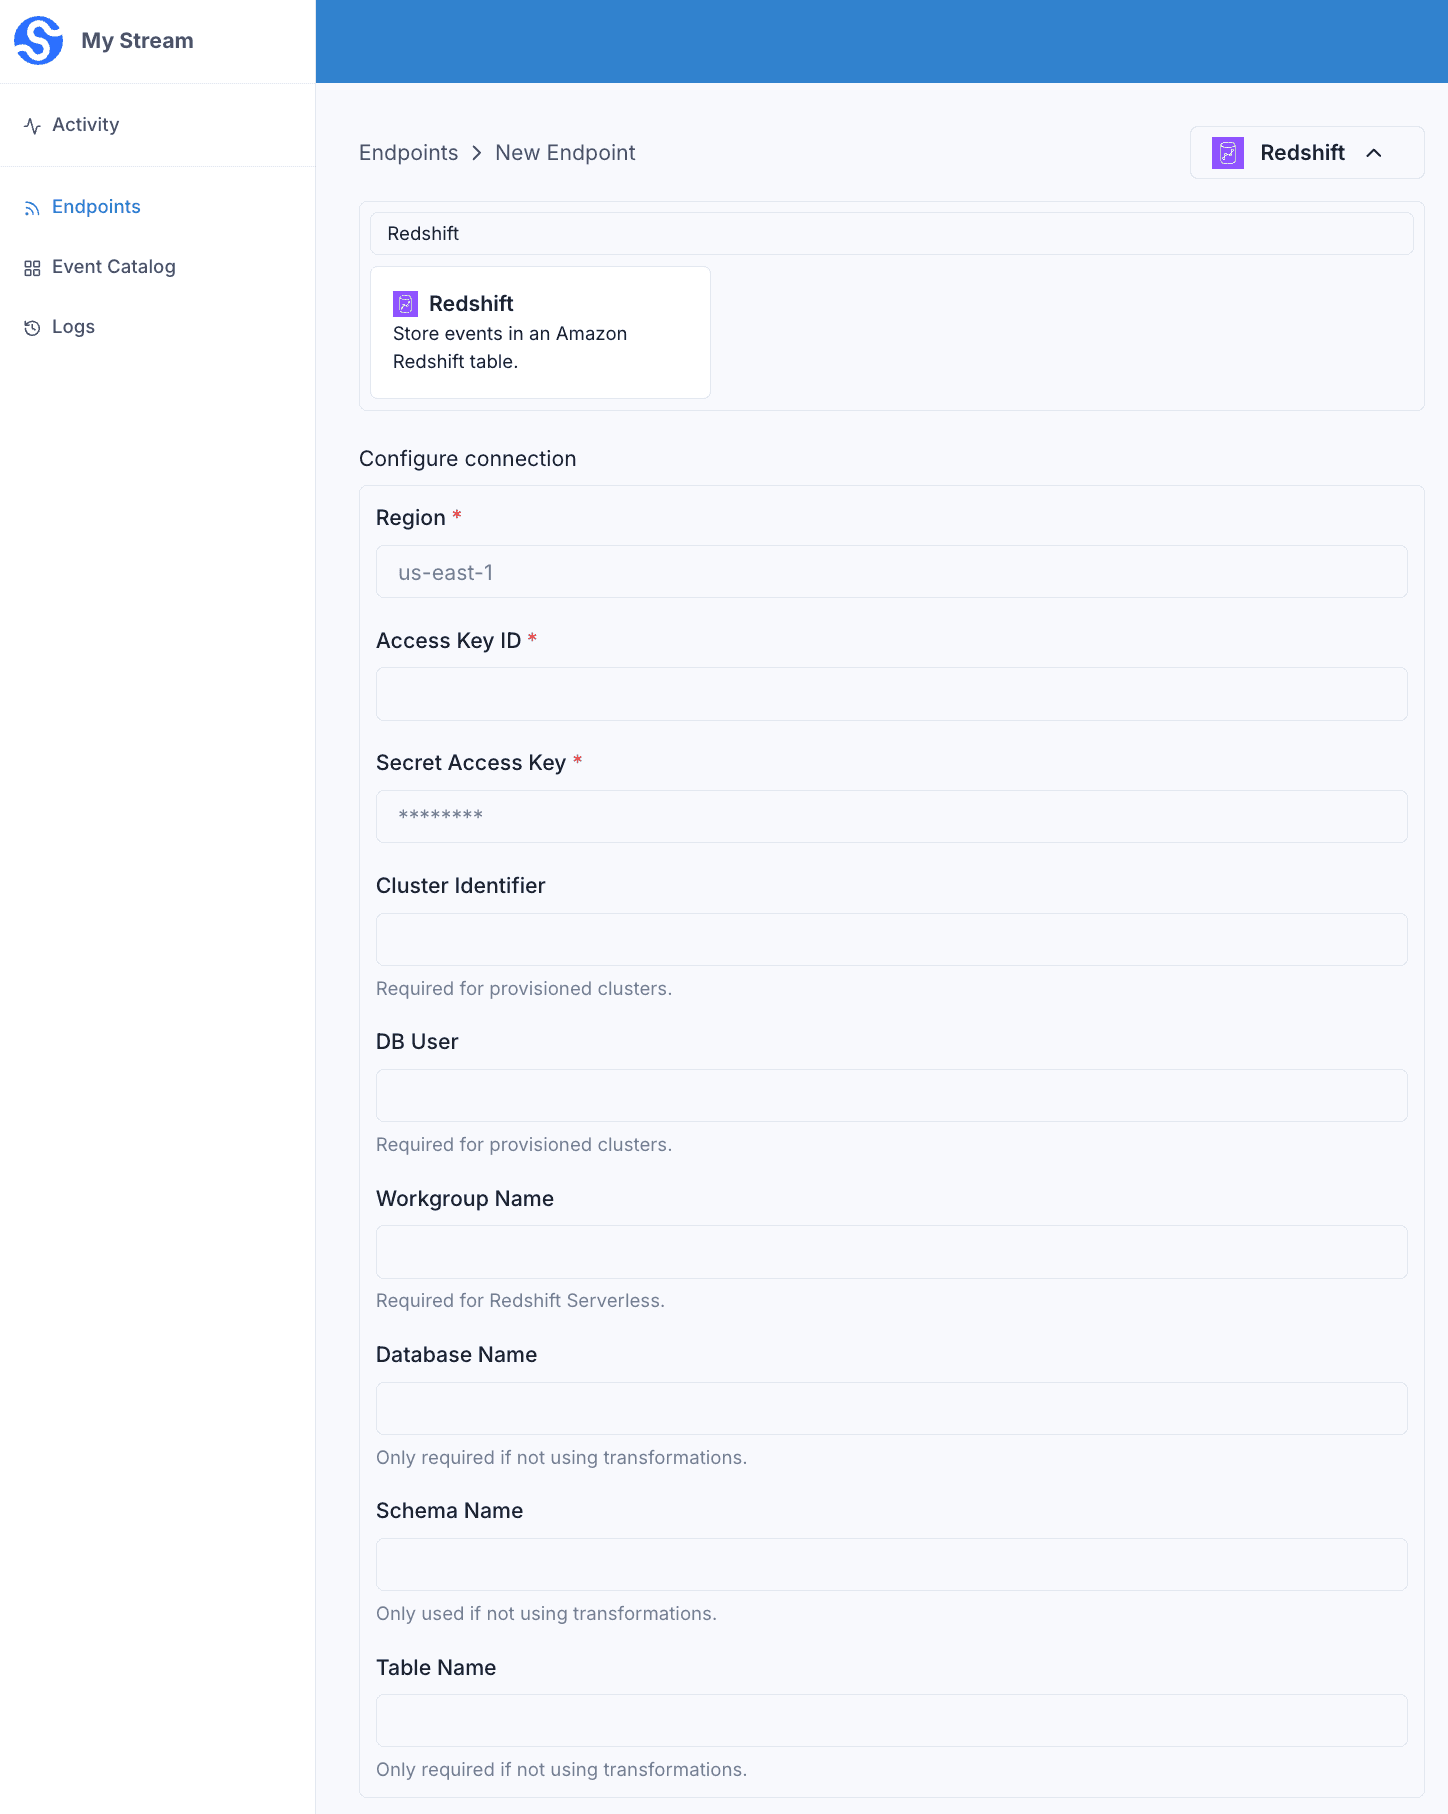
They will be able to configure the connection right in the App Portal:
region,accessKeyId,secretAccessKey— the AWS region and credentials used to authenticate.dbName— the database to write to.schemaName— the schema that contains the table (optional).tableName— the table that receives the rows.
Every batch of webhooks received by the endpoint is inserted into the configured Redshift table.
Connection
How you point Svix at your Redshift depends on the deployment type:
- Redshift Serverless — set
workgroupNameto the name of your workgroup. - Provisioned clusters — set
clusterIdentifierto your cluster’s identifier anddbUserto the database user to connect as.
Destination table
Without a transformation, Svix inserts each webhook into the table identified by dbName, schemaName, and tableName using two columns: created_at and payload. Svix sets created_at to the insert time and writes the raw payload to payload.
The table must already exist before you enable the endpoint. For the default behavior, create it with:
CREATE TABLE events (
  created_at TIMESTAMP,
  payload VARCHAR(65535)
);
At the time of writing, VARCHAR(65535) is the largest allowable VARCHAR size in Redshift. If webhooks with larger payloads are received by the endpoint, the endpoint will be disabled since these payloads can’t be written to Redshift.
The dbName, schemaName, and tableName fields are only required when you’re not using a transformation. With a transformation, the target table is named directly in your statement.
Transformations
Redshift transformations build a parameterized SQL statement. The transformation returns the statement to run and the bindings it references.
/**
 * @param input - The input object
 * @param input.events - The array of webhooks in the batch. The number of webhooks in the batch is capped by the endpoint's batch size.
 * @param input.events[].payload - The message payload (string or JSON)
 * @param input.events[].eventType - The message event type (string)
 *
 * @returns Object describing the SQL to run against Redshift.
 * @returns returns.statement - The SQL statement to execute. Reference parameters by name (e.g. :payload0).
 * @returns returns.bindings - The parameters referenced by the statement. Each binding is an object with a `name` and a `value`.
 */
function handler(input) {
    let bindings = [];
    let values = [];

    input.events.forEach((event, i) => {
        const name = `payload${i}`;
        bindings.push({ name: name, value: JSON.stringify(event.payload) });
        values.push(`(CURRENT_TIMESTAMP, :${name})`);
    });

    return {
        bindings: bindings,
        statement: `INSERT INTO events (created_at, payload) VALUES ${values.join(", ")};`
    };
}
input.events is the list of webhooks received by the endpoint, processed in batches.
bindings is an array of { name, value } parameters, and the statement references them by name (e.g. :payload0). The statement is run against your database through the Redshift Data API. To write different columns, adjust the bindings, the statement, and your table to match.
For example, if the endpoint receives the following messages:
{
  "eventType": "user.created",
  "payload": "{\"email\": \"joe@enterprise.io\"}"
}
{
"eventType": "user.login",
"payload": "{\"id\": 12, \"timestamp\": \"2025-07-21T14:23:17.861Z\"}"
}The transformation above inserts two rows into your table.
created_at | payload |
|---|---|
2025-07-21 14:23:18 | {"email":"joe@enterprise.io"} |
2025-07-21 14:23:18 | {"id":12,"timestamp":"2025-07-21T14:23:17.861Z"} |