Advanced Destinations
Svix supports multiple types of destinations in addition to regular webhook endpoints, to support different use cases.
- Polling Endpoints
- FIFO Endpoints
- Object Storage
- OpenTelemetry Tracing
- Snowflake
- RabbitMQ
- Amazon EventBridge
- Amazon SNS
- Amazon SQS
- Google BigQuery
- ClickHouse
- Amazon Redshift
- ElasticSearch / OpenSearch
- PostHog
- Segment
Enabling Advanced Destinations
Advanced Destinations can be enabled at the environment level in the Svix Dashboard .
You can choose the individual advanced destinations you’d like to make available to your customers.
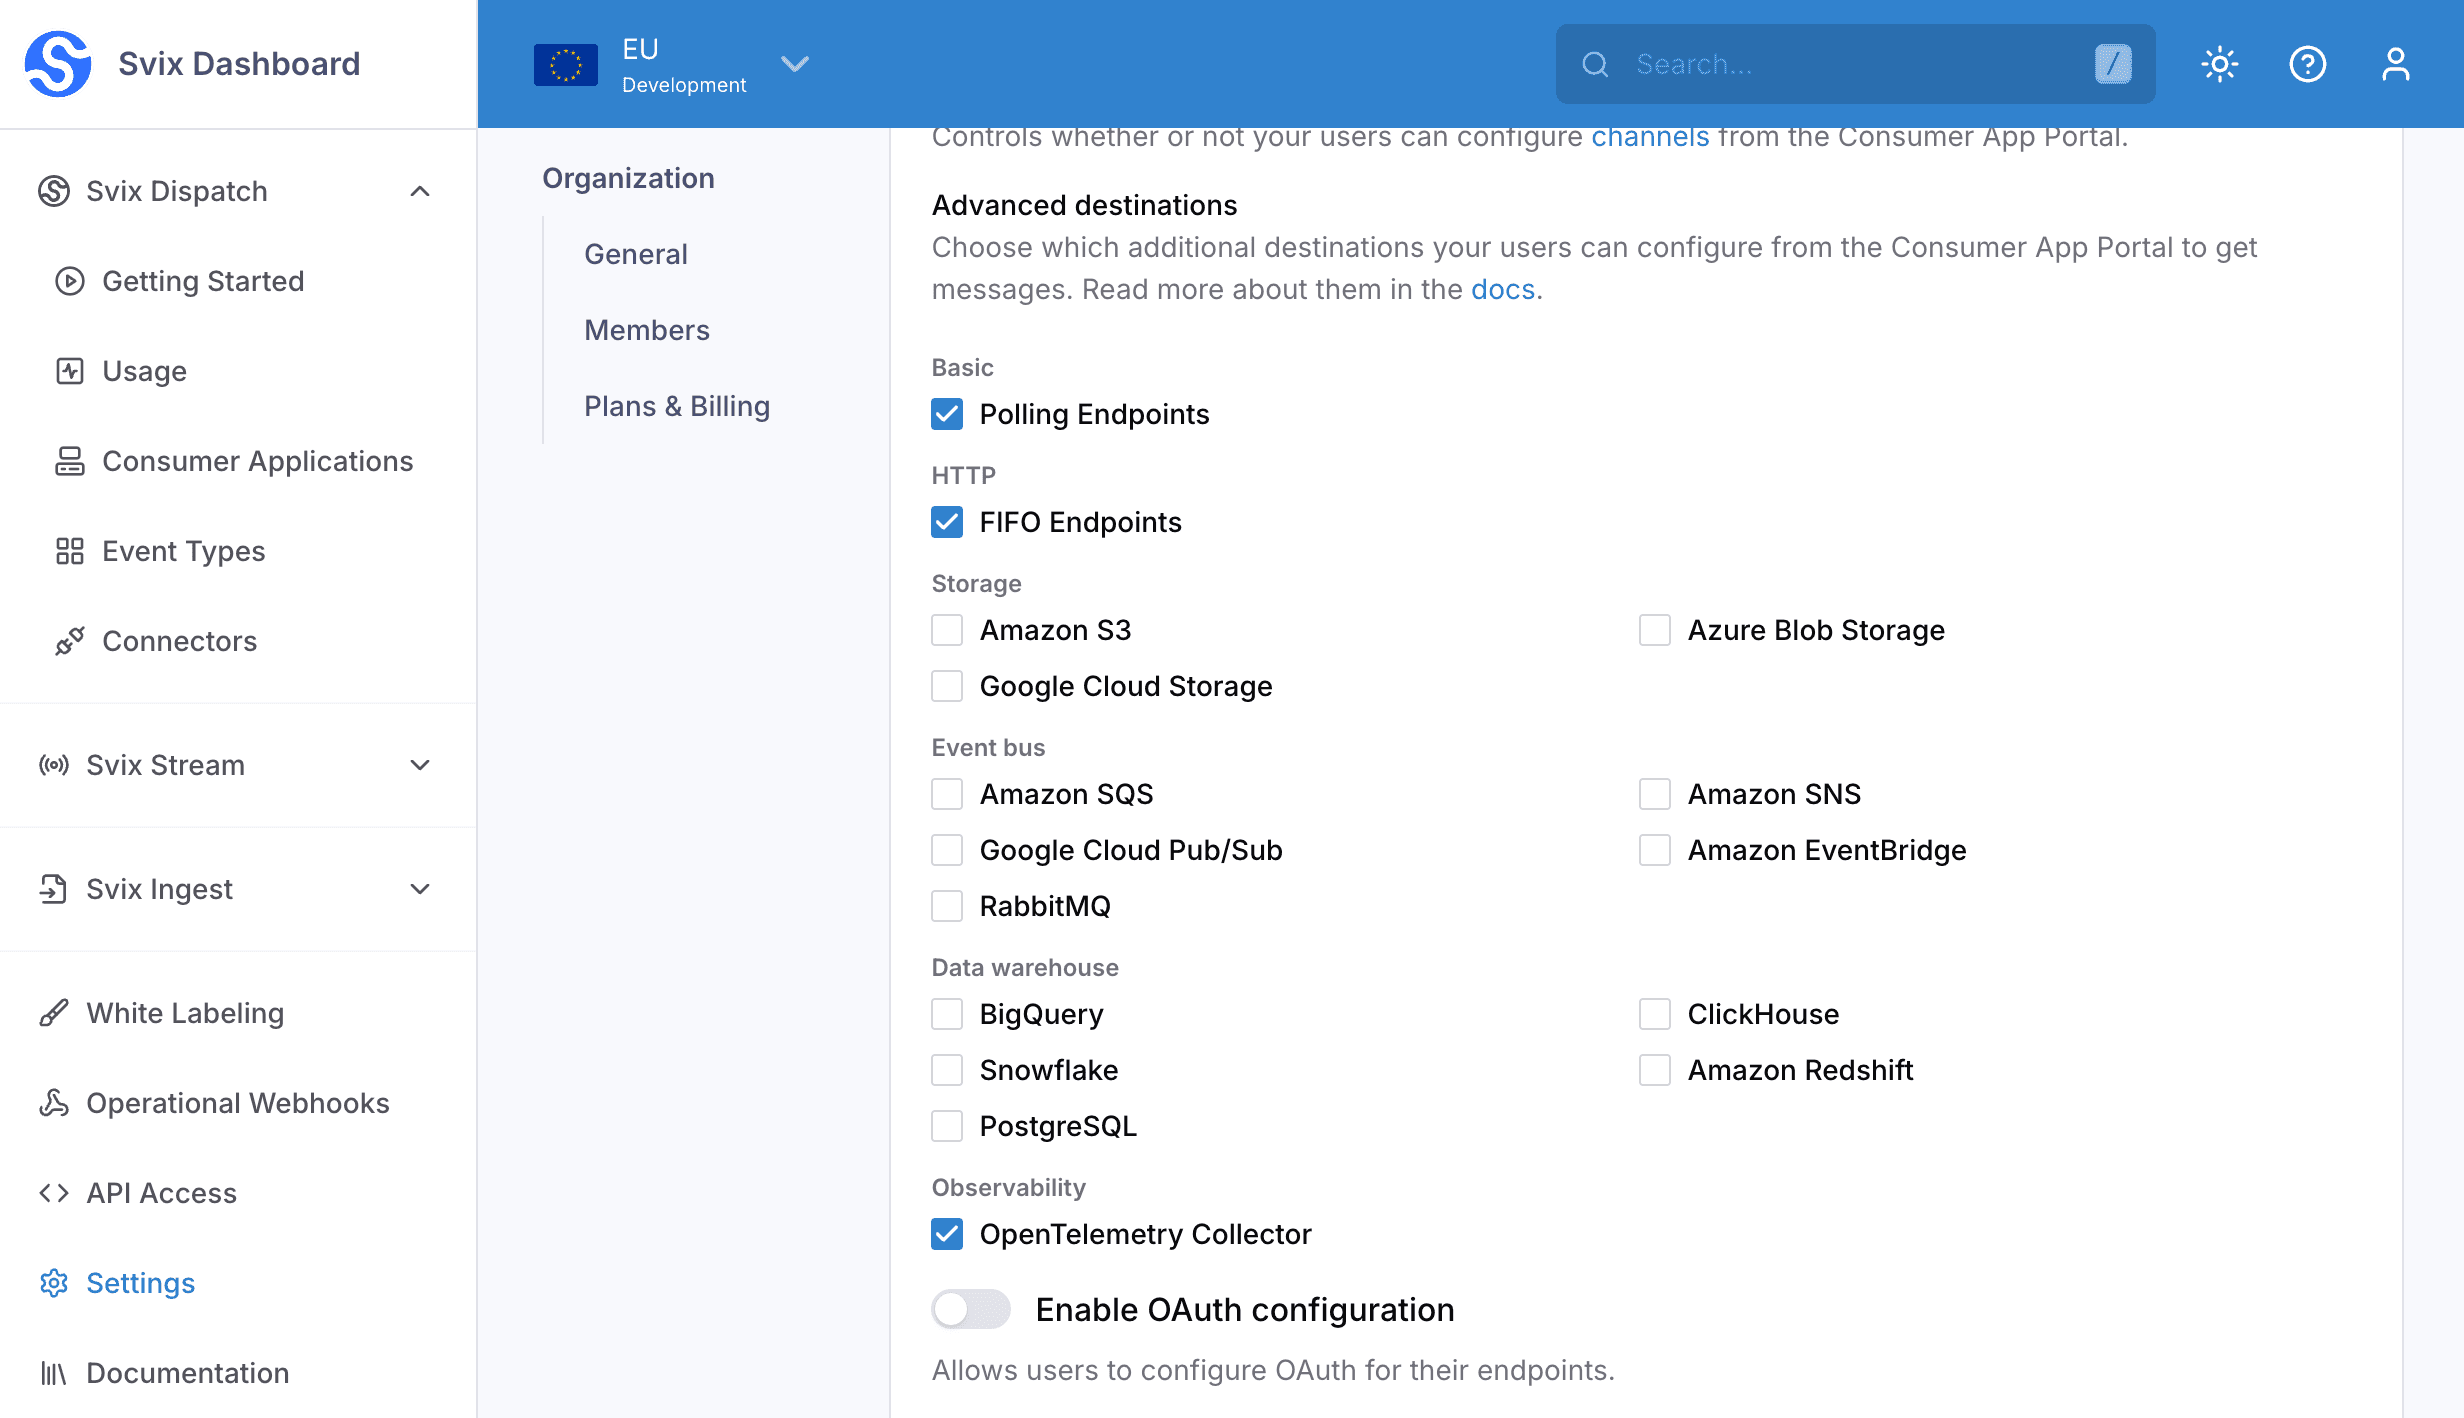
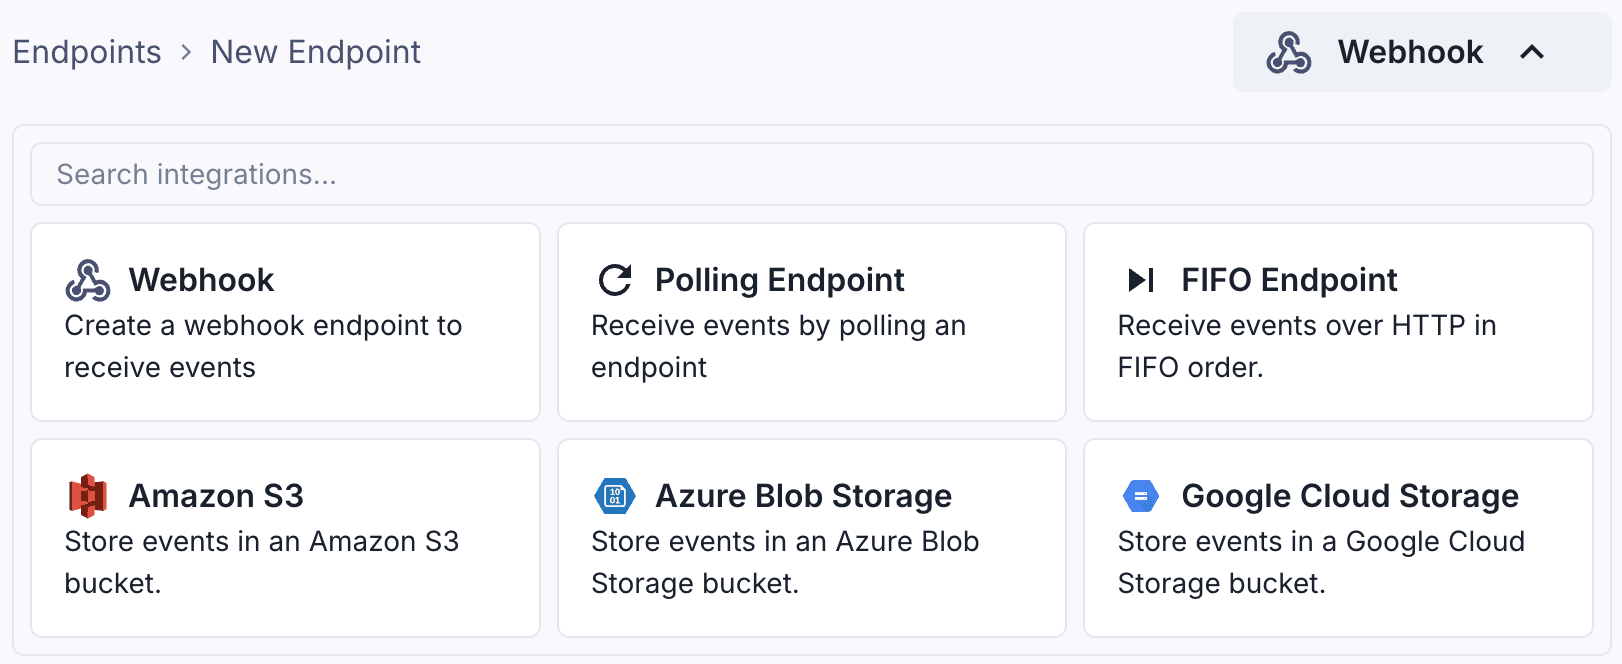
When you enable Advanced Destinations, your users will be able to create them in the Application Portal.
Using the API
Like regular endpoints, Advanced Destinations can managed by your users via the Application Portal, or through the Svix API.
The destination API can be used to create, update, and delete Advanced Destinations. Here is an example of how to create an Amazon S3 destination using the create destination API :
import { DestinationStatusIn, Svix } from "svix";

const svix = new Svix("auth_token");
const dest = await svix.destination.create("example-customer-123", {
  uid: "unique-identifier",
  status: DestinationStatusIn.Enabled,
  batchSize: 100,
  maxWaitSecs: 10,
  type: "amazonS3",
  config: {
    bucket: "my-s3-bucket-name",
    region: "us-west-2",
    accessKeyId: "ACCESS_KEY",
    secretAccessKey: "SECRET_KEY",
  },
});Using the API can be useful in cases where you are implementing your own Consumer App Portal functionality, or if you want to create a destination on behalf of your customers programmatically.
Destinations can be configured with batching and transformations, and can be created in the App Portal or through the API.
Event type filtering works the same way it does for webhook endpoints. You can also filter by channels. If no event types are selected, the destination receives every message sent to the application.
Dispatch Order
Messages are always dispatched to a destination in the same order they were sent to the application.
Consider messages sent to an application like this:
import { Svix } from "svix";

const svix = new Svix("auth_token");

await svix.message.create("example-customer-123", {
  eventType: "event.one",
  payload: { data: "first event" },
});
await svix.message.create("example-customer-123", {
  eventType: "event.two",
  payload: { data: "second event" },
});
await svix.message.create("example-customer-123", {
  eventType: "event.three",
  payload: { data: "third event" },
});
await svix.message.create("example-customer-123", {
  eventType: "event.four",
  payload: { data: "fourth event" },
});
await svix.message.create("example-customer-123", {
  eventType: "event.five",
  payload: { data: "fifth event" },
});
These messages are stored in the same order they were sent.
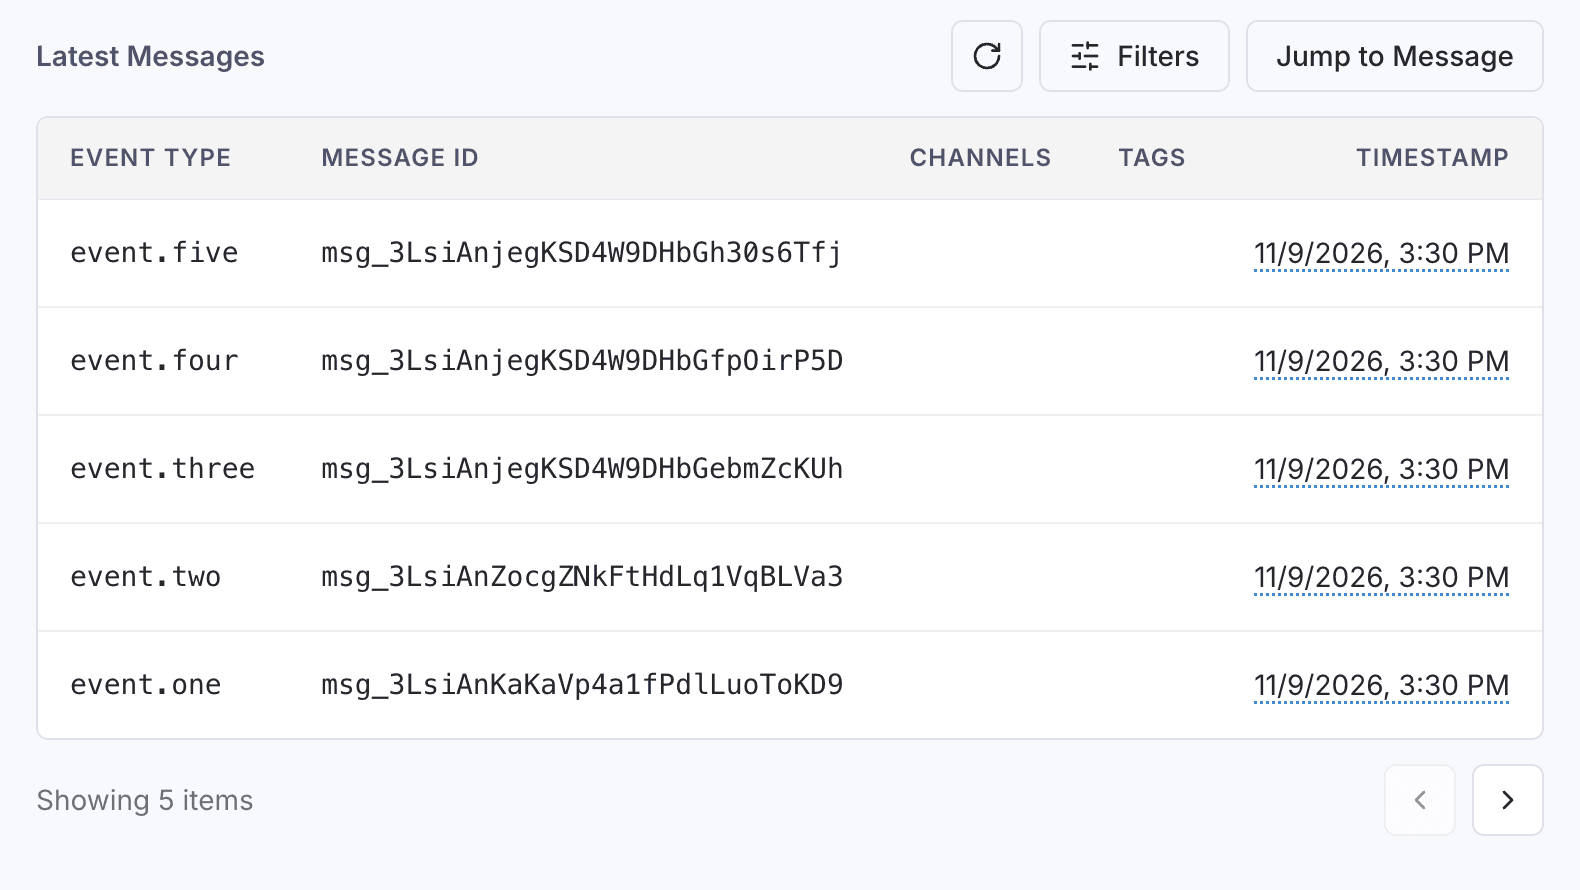
When dispatch occurs, that order is preserved. event.one will always be sent before (or batched in the same request as) event.two, event.two will always be sent before (or batched in the same request as) event.three, and so on.
Ensuring strict FIFO ordering comes with some tradeoffs. Since every call to the receiver endpoint is blocked until the previous one is successful, throughput is limited compared to regular webhook endpoints.
Batching helps increase destinations throughput by sending multiple messages in a single request.
Batching
All destinations (with the exception of Polling Endpoints) can be configured with a batchSize and maxWaitSecs, which determines how large and how frequently batches are sent.
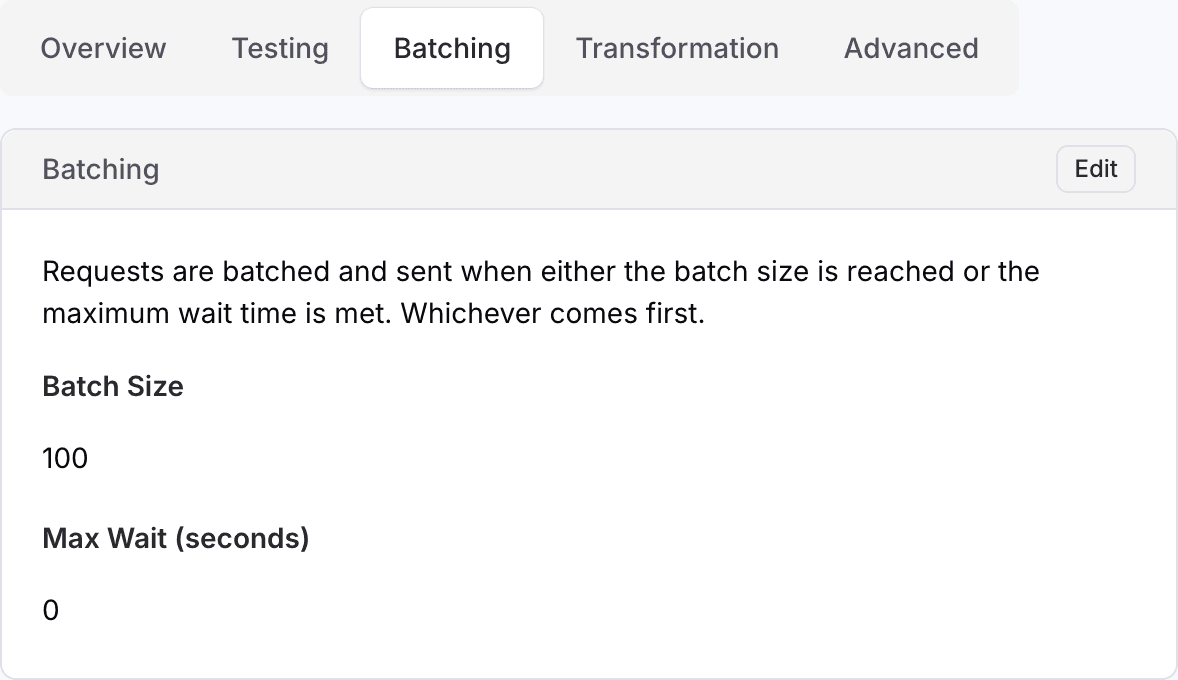
Messages are dispatched when either condition is met:
- Enough messages have accumulated to meet the batch size, or
- The
maxWaitSecshas passed since the last message was dispatched
To maximize throughput on the destination, keep batch sizes large and set maxWaitSecs to 0.
To minimize resource utilization on the destination, keep batch sizes large and set maxWaitSecs to the largest value your destination can tolerate.
Transformations
All destinations (with the exception of Polling Endpoints) are configured with custom transformation code, which gives precise control over how messages are shaped before being sent to the destination.
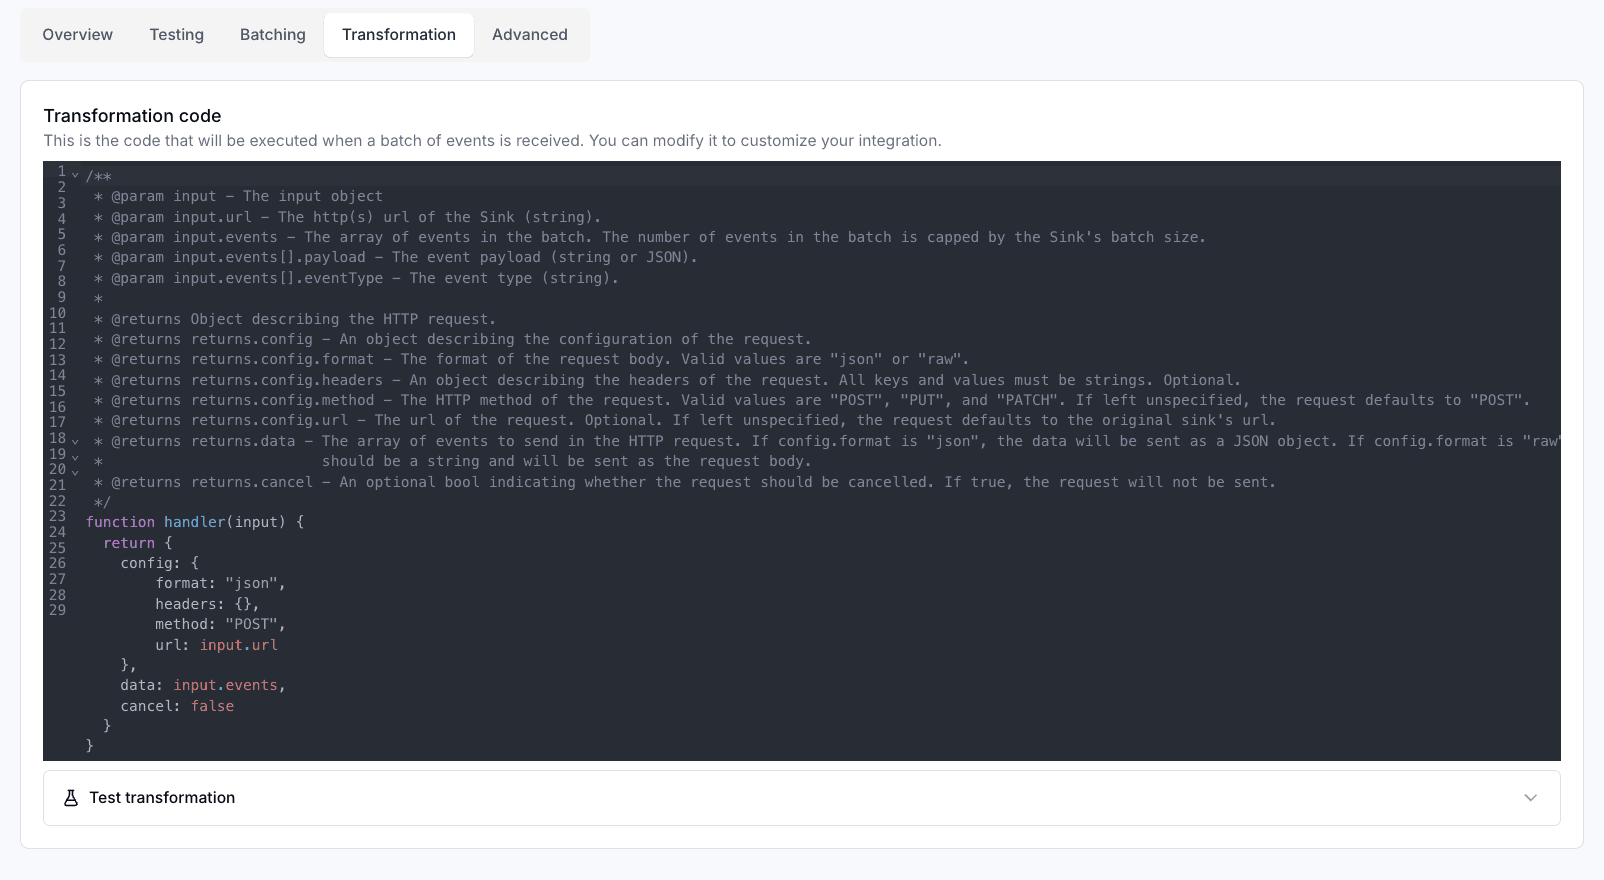
Because transformations shape the request to the destination, each destination type has its own transformation template. HTTP destinations let you configure parameters like the URL, body, and headers, while object storage destinations (amazonS3, googleCloudStorage) let you control the object key name and contents.
For example, the transformation code for an HTTP destination can be as simple as:
/**
 * @param input.events - The array of messages in the batch.
 * @param input.events[].payload - The message payload (string or JSON).
 * @param input.events[].eventType - The message event type (string).
 */
function handler(input) {
  return {
    config: {
        format: "json",
    },
    data: input.events
  }
}
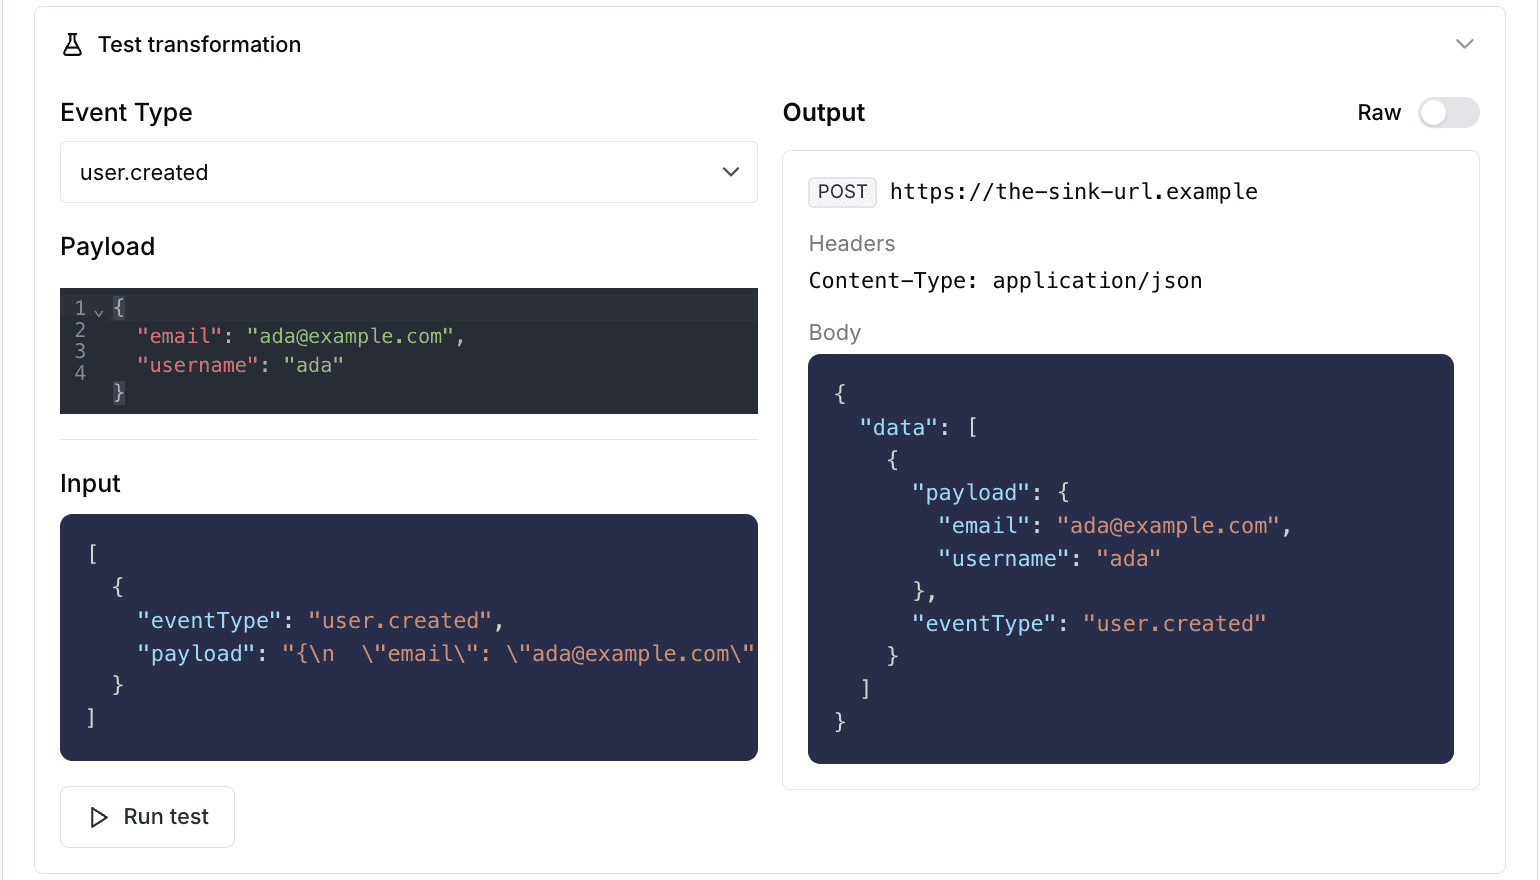
This would take all the messages in the batch, and make a POST request to the HTTP endpoint with the body:
{
    "data": [
        {
            "eventType": "user.created",
            "payload": { "email": "joe@enterprise.io" }
        },
        {
            "eventType": "user.login",
            "payload": {"id": 12, "timestamp": "2025-07-21T14:23:17.861Z"}
        }
    ]
}
You can also test your transformation code on custom events directly in the App Portal, in the transformations tab.
Dispatch Failures and Retries
If dispatch fails, Svix will make a best effort to deliver the messages by retrying with exponential backoff.
You can see if dispatch is in a retrying state on the destination’s page in the App Portal.
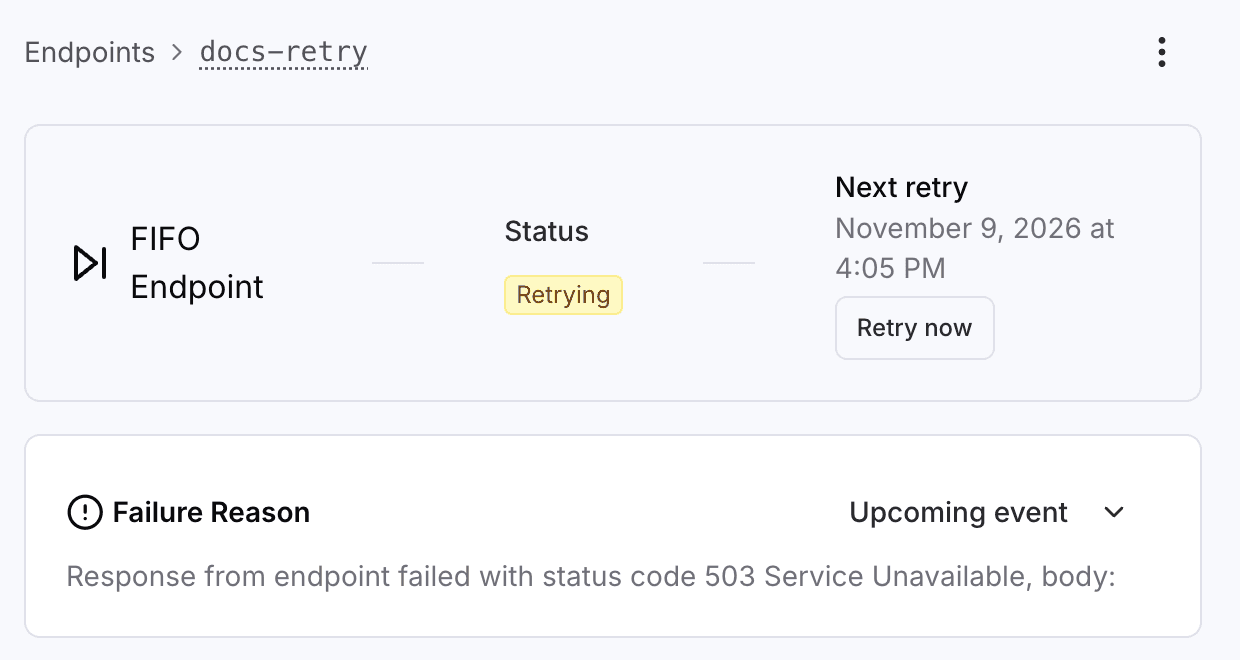
The status bar will also tell you:
- When the next retry is scheduled.
- What the reason for the dispatch failure was.
If dispatch fails because the destination is misconfigured, or the retry schedule was exhausted, the destination will automatically be disabled.
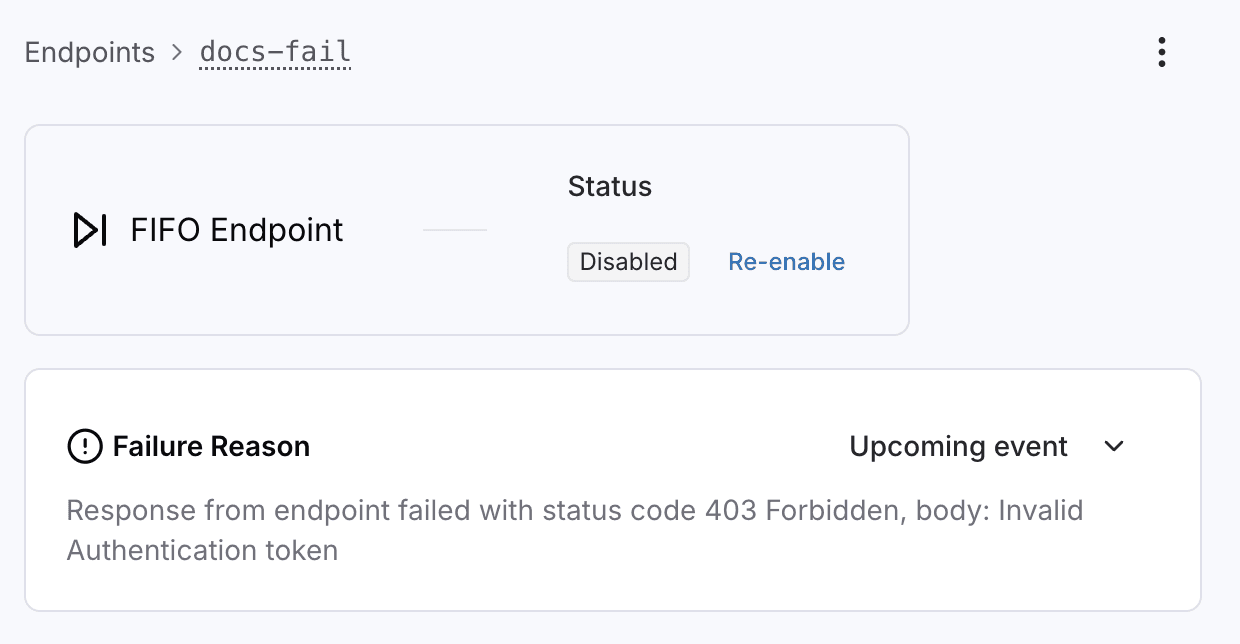
While a destination is disabled, messages can still be sent to the application without interruption.
In the UI, you can still change the destination’s configuration, and re-enable it once the error is resolved. Once a destination is re-enabled, it will resume dispatching messages from where it left off.